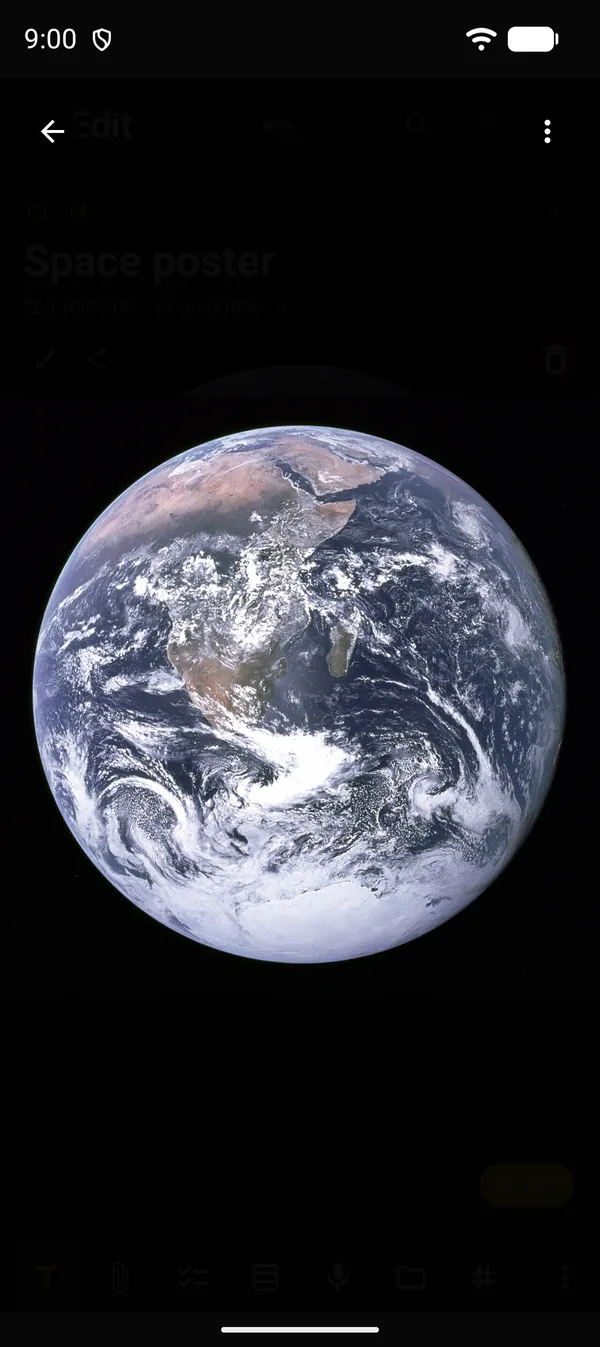
DicaNote’s photo tools live in its image viewer. You open the photo from the note, tap ⋮ and pick what to do. The example in this guide is the “Space poster” note, with a public-domain NASA photo of Earth.
1. Open the photo
In the note, tap the photo. It opens full screen in the viewer. To put a photo in a note, see adding attachments.
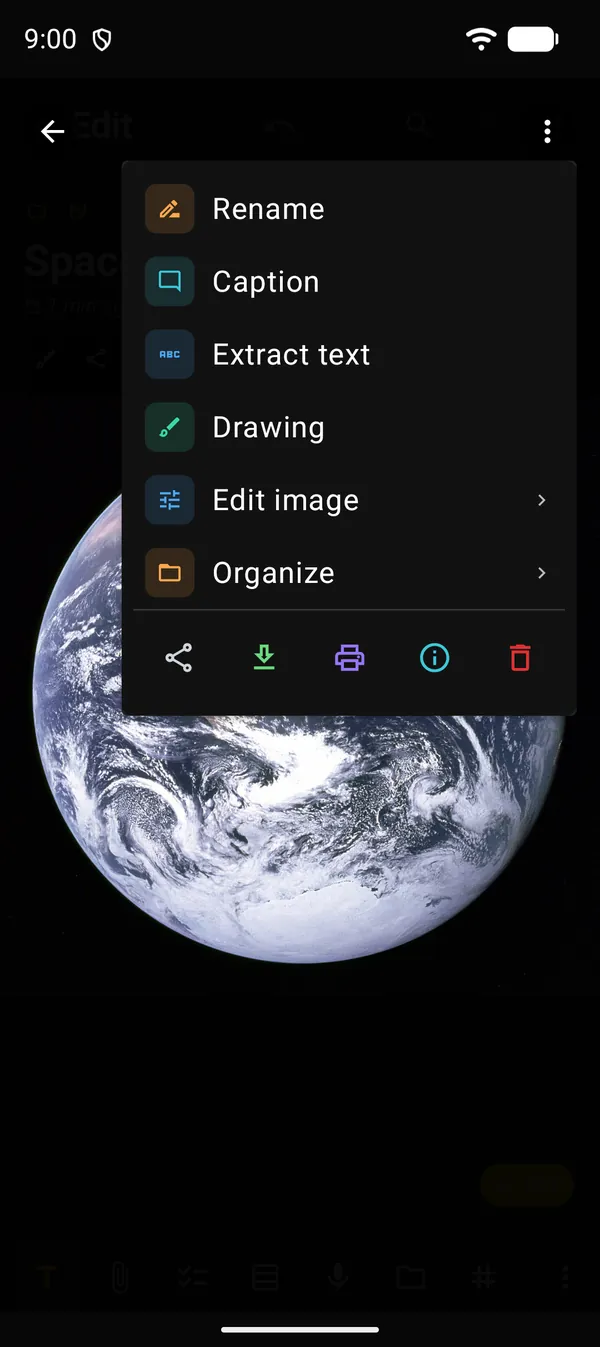
2. The viewer’s ⋮ menu
| Option | What it does |
|---|---|
| Rename | Changes the file name |
| Caption | Keeps a short text about the photo. Its first line shows in the menu itself |
| Extract text | Reads the text in the photo (section 6) |
| Drawing | Draws on top of the photo (section 6) |
| Edit image | Opens the editing tools (section 3) |
| Organize | Opens a second page of the menu |
The icon row at the bottom holds Share, Download, Print, Information and Delete. Touch and hold an icon to see its name.
3. Edit image
Tap Edit image to see the tools. Each one opens on its own screen.
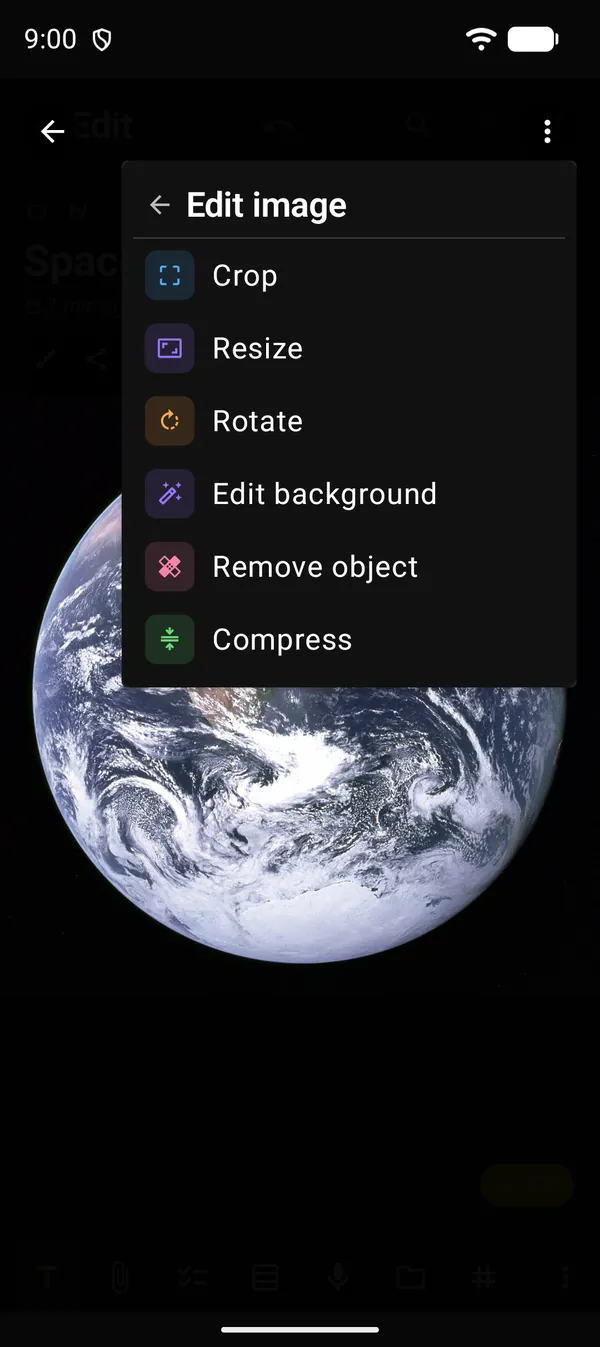
| Tool | What it does |
|---|---|
| Crop | Crops the photo with a free frame or a fixed ratio |
| Resize | Makes the photo smaller in pixels |
| Rotate | Opens the crop screen already turned 90° |
| Edit background | Removes the background, or swaps it for blur, white, black or a color |
| Remove object | Erases a person or object and fills the gap |
| Compress | Makes the file smaller |
If the photo has a drawing on it, cropping, rotating, or replacing it with a resized or compressed version merges the drawing into the image. The app asks first: Apply a permanent image edit? After that the drawing can no longer be edited separately.
4. Crop, rotate and resize
In Crop:
- Drag the frame or its corners. Pinch with two fingers to zoom in.
- Pick a ratio: Free, Original, 1:1, 4:3, 3:4 or 16:9.
- The buttons under the photo rotate, Flip and Reset. The final size in pixels shows on the right.
- Tap Replace to swap the photo in the note. The round download button, Download copy, saves a copy to your device.
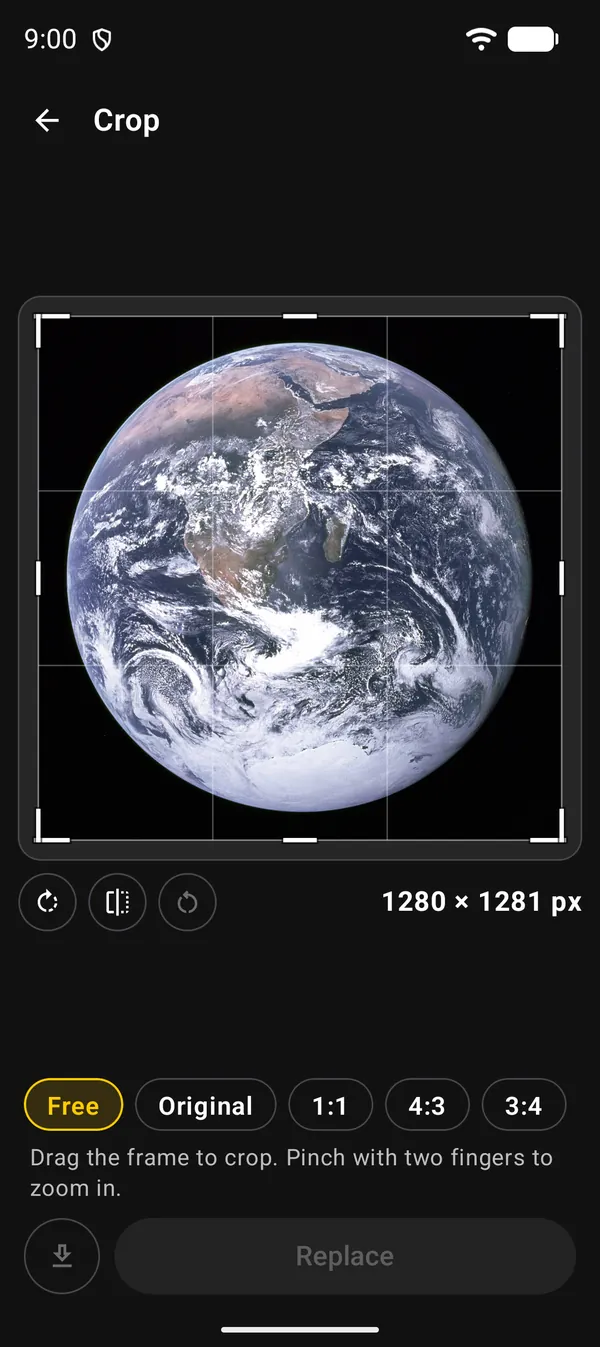
Rotate opens the same screen, already turned 90°. Tap the rotate button again until the photo is upright.
Resize shows the photo at its new size. Use the percentage slider, the 25 %, 50 % and 75 % shortcuts, or type Width (px) and Height (px). The chain icon keeps the aspect ratio. Under the photo you see the file size before and after. Hold Compare to check for lost sharpness. The final buttons are the same as in Crop.
5. Background, objects and compression
Edit background downloads a model the first time, so that first use needs internet. Then the app separates the subject from the background:
- On the Background tab, pick None for a transparent background, or Blur, White, Black or Color.
- On the Refine tab, Erase and Restore fix the edge with your finger, and Wand selects similar colors.
- With more than one subject in the photo, the Subjects tab picks which ones stay.
Save copy to note adds the new version to the note. The original photo stays as it is. You can also share or download the result.
Remove object also downloads a file the first time (16 MB). With Tap, tap the object. With Brush, paint over it. Unmark takes parts out of the marking. Tap Remove, and at the end Save to note, which adds an edited copy.
Compress starts working as soon as it opens. Pick Standard, a smaller file with good quality, or HD (High Quality), a sharper image and a larger file. The app shows how much smaller the file got. Tap Replace to swap the photo in the note, or the download button to save it to your device.
6. Extract text and draw
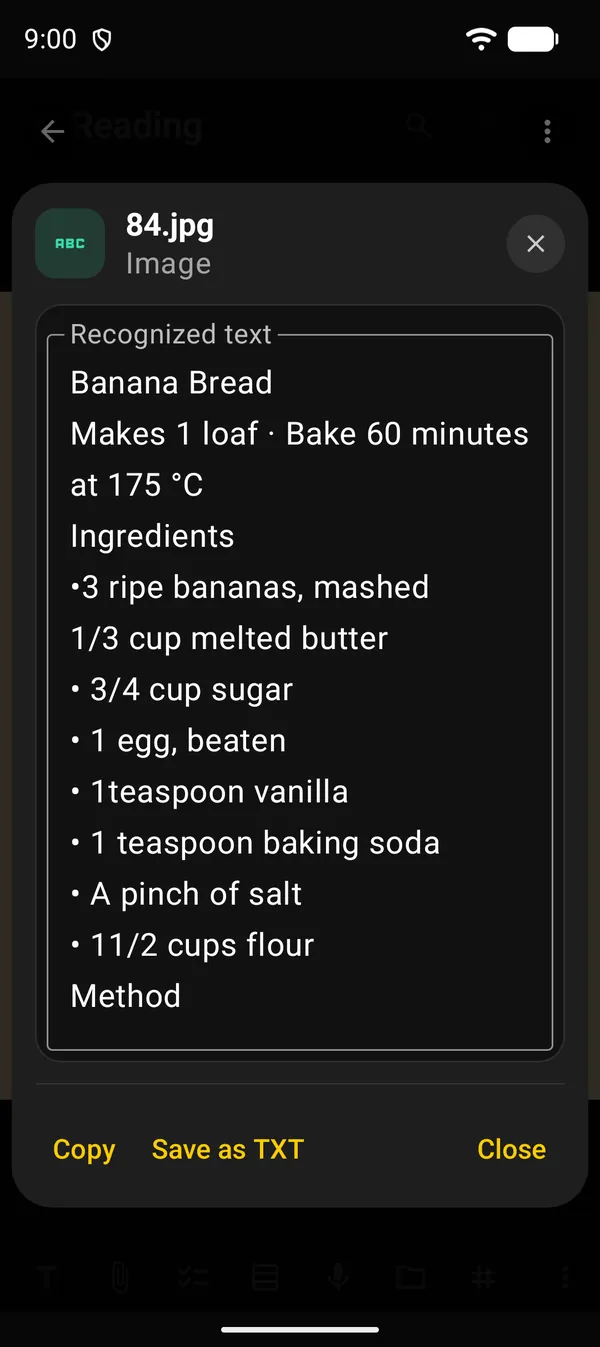
Extract text reads the text in the photo and opens Recognized text. You can correct the text before using it:
- Copy puts it on the clipboard.
- Save as TXT makes a text file.
- Save text keeps the text with the photo. Search then finds the photo by those words.
If the app has already read the photo, the window opens on Saved text. Tap Scan again for a fresh reading.
Drawing opens drawing mode on top of the photo. The drawing stays on its own layer and remains editable until you use one of the permanent edits from section 3.
Next guides
FAQ
Does editing delete the original photo?
It depends on the button. Replace swaps the photo in the note. Edit background and Remove object save a copy to the note and keep the original. Download copy saves to your device without touching the note.
Do I need internet?
Only the first time you use Edit background and Remove object, to download what those tools need. After that the processing happens on your device.
Why are some options greyed out?
Some tools wait for the photo and its drawing to load. GIF and SVG images don't support every edit.